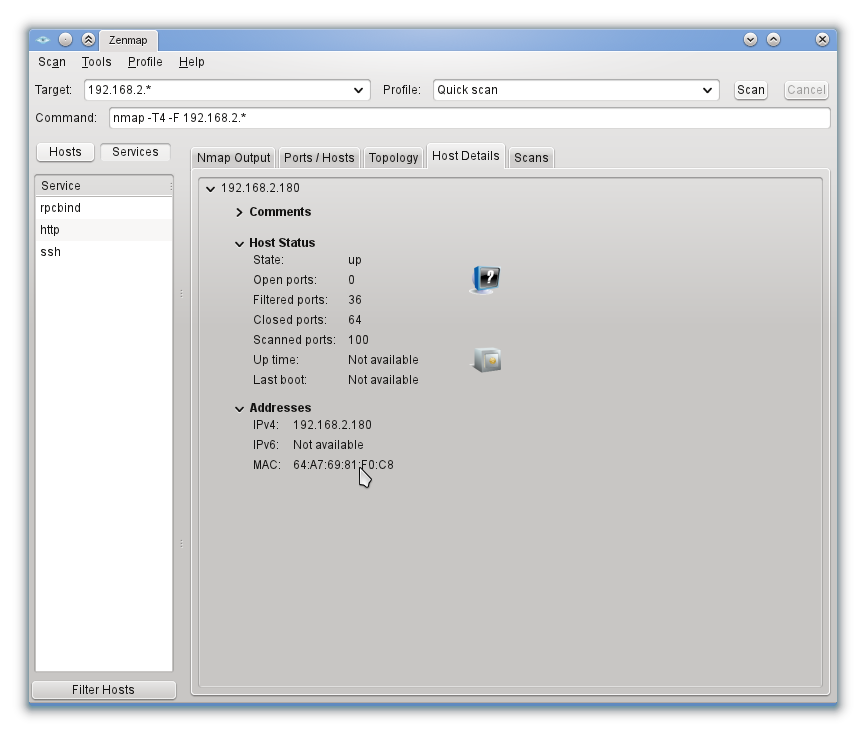
Reminder to self: nmap has an official gui since 2005. It’s called Zenmap! Comes in quite handy if you’re only an occasional user. 😉
Last night I was fooling around with lwjgl (nice lib btw), when suddenly I started getting the following exception:
org.lwjgl.LWJGLException: Could not choose GLX13 config
	at org.lwjgl.opengl.LinuxDisplayPeerInfo.initDefaultPeerInfo(Native Method)
	at org.lwjgl.opengl.LinuxDisplayPeerInfo.(LinuxDisplayPeerInfo.java:61)
	at org.lwjgl.opengl.LinuxDisplay.createPeerInfo(LinuxDisplay.java:782)
	at org.lwjgl.opengl.DrawableGL.setPixelFormat(DrawableGL.java:61)
	at org.lwjgl.opengl.Display.create(Display.java:871)
	at org.lwjgl.opengl.Display.create(Display.java:782)
	at org.lwjgl.opengl.Display.create(Display.java:764)
I googled and some Minecraft stuff turned up (seems it uses lwjgl as well), but only with mysterious “solutions”. I thought it was because I tried to run it from console (it ran fine before in IntelliJ), but it stopped working there too. Then I suspected mixing openjdk compiled code run by sun jre was the problem (seems lwjgl requires sun jre). Than I fumbled around with the java.library.path variable because it looked like a 64bit vs 32bit issue. NONE OF THAT!
I screwed up and it was late, so I decided to admit my defeat and go to bed.
Today I started my suse box, suddenly I realized my KDE desktop effects were disabled. Nvidia driver borked? Reinstalled my nvidia, even rebooted, all in vein!
I checked hardware acceleration with Urban Terror, smooth gaming!
Then I started to retrace my steps of last night.. I tried to install glc which in the past had proven to be quite a decent opengl capture program for linux.
I checked my repos and noticed I accidentally installed the 12.1 version! Uninstalling that does not fix it of course, probably some dependency messed up things good (although still quite subtle to keep everything else working ;)).
I finally come to the point of this post 😉 I wanted to know what I installed last night in the late hours that seriously borked my system.
Turns out rpm has a neat option just for that: –last !
So it goes like this:
# rpm -qa --last | less
yields amongst others:
libcurl4-7.21.2-10.11.1                       Mon 30 Jan 2012 11:06:02 PM CET
libcurl4-32bit-7.21.2-10.11.1                 Mon 30 Jan 2012 11:06:02 PM CET
glibc-locale-2.14.1-14.18.1                   Mon 30 Jan 2012 01:46:16 AM CET
glibc-devel-2.14.1-14.18.1                    Mon 30 Jan 2012 01:46:11 AM CET
parallel-printer-support-1.00-5.1             Mon 30 Jan 2012 01:46:10 AM CET
glibc-2.14.1-14.18.1                          Mon 30 Jan 2012 01:46:08 AM CET
gpg-pubkey-b185393d-47965930                  Mon 30 Jan 2012 01:45:55 AM CET
phpMyAdmin-3.4.9-30.1                         Thu 19 Jan 2012 09:22:30 PM CET
I managed to fubar my glibc 🙂 culprit found! Reverting this to the previous version fixed it!
In the past 6 years, this blog hasn’t changed that much. I added a plugin here and there, integrated google buzz posts, etc., but the core wordpress install remained the same. After procrastinating the upgrade several years, I thought, mmm.., spammers don’t bother anymore to hack an ancient wordpress install! So I left it at that. 🙂
Unfortunately, lately, spammers have become less lazy, so my blog still got targetted again. Today I finally made the switch to WordPress 3.3.1 and although I didn’t expect wordpress to support the giant version leap, it did!
I was tempted to leave the design just the way it was (you know, good old kubrick), and leave it at just a back-end upgrade. But then I thought it would be nice to have a descent display on mobile devices, which comes for free with the newer themes of course. Also my beloved antispam plugin Spam Karma 2 which was abandoned a few years ago (Thanks anyway Dave!), was in for replacement.
So I decided to switch to the fancy twentyeleven theme and tweak the header (about the only thing I care to tweak :)). The tweak consists of making the header smaller and move it up:
#branding img {

    height: 180px;

    margin-bottom: -7px;

    margin-top: -100px;

    width: 100%;

}
The best way to apply this tweak is by creating a child theme.
Btw, the header image is based on a photo of one of the layers present in an LCD display (thanks to sonic840).
Using widgets I was able to recreate the same look as in the old theme (having the categories, archive, etc).
I was hesitating to keep with wordpress, but I’m glad I did (for a blog at least):
So you have this linux box and you want to add an extra harddrive without having to reboot it. The key command we’re looking for, is a way to rescan the scsi bus. This can be achived by rewriting some values in the /sys synthetic filesystem:
echo "- - -" > /sys/class/scsi_host/host#/scan
Replace the digit for the scsi host as appropiate.
If everything went well, you should get output on the console indicating it detected a new hard drive.
Main feature in this release is the widget! It reflects current login state and clicking on it opens the activity.. I also switched to using the AndroidHttpClient explicitly to allow proper resource cleanup although I’m not sure that won’t give any problems for pre-Froyo platform users..
Changelog
+ widget: shows login state, click on widget to open activity
+ activity: show last login time and ip
* service: correctly parse json response to allow proper logout
* service: moved logout action into service
* service: use AndroidHttpClient instead of HttpClient to avoid IllegalStateExceptions
* service: don’t attempt login on portal error
+ activity: initial localisation support
Changelog
– fc bugfix on portal connection failure
– fc bugfix: intent may be null on service restart
– log ip on successful logon (trying to find connection refused problem)
Changelog
– complete refactor: service based login, no activity dependency anymore
– automatic login
– parse json portal replies to return adequate errors
– logout function (also requires json)
– detailed login feedback

Note: the beta app is a separate app from the stable one.
Debugging your android app using a hardware device has several advantages, ie faster and more testing possibilities. On windows you have to install a custom USB driver, on linux it’s a matter of configuring your udev rules:
/etc/udev/rules.d , ie 44-android.rulesSUBSYSTEM=="usb", ATTR{idVendor}=="0bb4", MODE="0666", GROUP="users"and adapt the vendor id using this table.
udevadm control --reload-rules When you run adb devices, it should now list your device:
List of devices attached
emulator-5554   device
SH14FPL06953    device
Before, you would rather have something like this:
List of devices attached
emulator-5554   device
????????????    no permissions
On succesful connection, the system log shows something like:
kernel: [11172.551464] usb 2-1: USB disconnect, address 4
kernel: [11178.813044] usb 2-1: new high speed USB device using ehci_hcd and address 5
kernel: [11178.942137] usb 2-1: New USB device found, idVendor=0bb4, idProduct=0c87
kernel: [11178.942150] usb 2-1: New USB device strings: Mfr=1, Product=2, SerialNumber=3
kernel: [11178.942157] usb 2-1: Product: Android Phone
kernel: [11178.942162] usb 2-1: Manufacturer: HTC
kernel: [11178.942166] usb 2-1: SerialNumber: SH14FPL06953
kernel: [11178.943867] scsi8 : usb-storage 2-1:1.0
mtp-probe: checking bus 2, device 5: "/sys/devices/pci0000:00/0000:00:04.1/usb2/2-1"
mtp-probe: bus: 2, device: 5 was not an MTP device
kernel: [11179.953172] scsi 8:0:0:0: Direct-Access     HTC      Android Phone    0100 PQ: 0 ANSI: 2
kernel: [11179.953375] sd 8:0:0:0: Attached scsi generic sg4 type 0
kernel: [11179.961631] sd 8:0:0:0: [sdd] Attached SCSI removable disk
Note that it seems normal that a usb storage device is detected, although I did not have it enabled on the phone.
One month ago, I bought an android smartphone and a few days later my first app was born: UZLGastennetLogin! =)
Note: This app is only useful to people working at or visiting the University Hospitals Leuven.
At UZLeuven we have a separate network to provide internet access to alien/untrusted devices: patient, visitor or external company laptops, tablets, smartphones etc. You need a personal access code to access this network though. When you are not logged in, any website you try to access, redirects you to a login portal.
There are 2 problems using this network on a smartphone:
This is where the app will come in handy:
The first version of the app allows only manual login, but it already saves you from using the webinterface and re-entering your credentials over and over again. Today, I published it on the market.